Why Your Venue Photos Are Costing You Bookings and How to Fix Them This Week
Your Photos Are Your First Tour
Before anyone sets foot in your venue, they have already decided whether it is worth visiting � based entirely on your photos. On Peerspace, Giggster, The Knot, and Google, your images are doing the job of a salesperson. And if those images are dark, blurry, poorly staged, or shot on a phone in 2019, they are actively driving potential clients to your competitors.
This is not hyperbole. Studies consistently show that 75-80 percent of people searching for event venues online make a yes-or-no decision based on the first image they see. If that image is underwhelming, they click back. If it is compelling, they scroll. Everything downstream � the tour, the conversation, the booking � starts with that first photo.
The good news: you do not need a $5,000 professional shoot to dramatically improve your listing photos. You need one weekend afternoon, a smartphone, and a strategy. The venue owners who are crushing it are not the ones with expensive photography. They are the ones with 20+ high-quality photos that show the space from multiple angles, in different lighting, and set up for different event types.
The 5 Types of Photos Every Venue Listing Needs
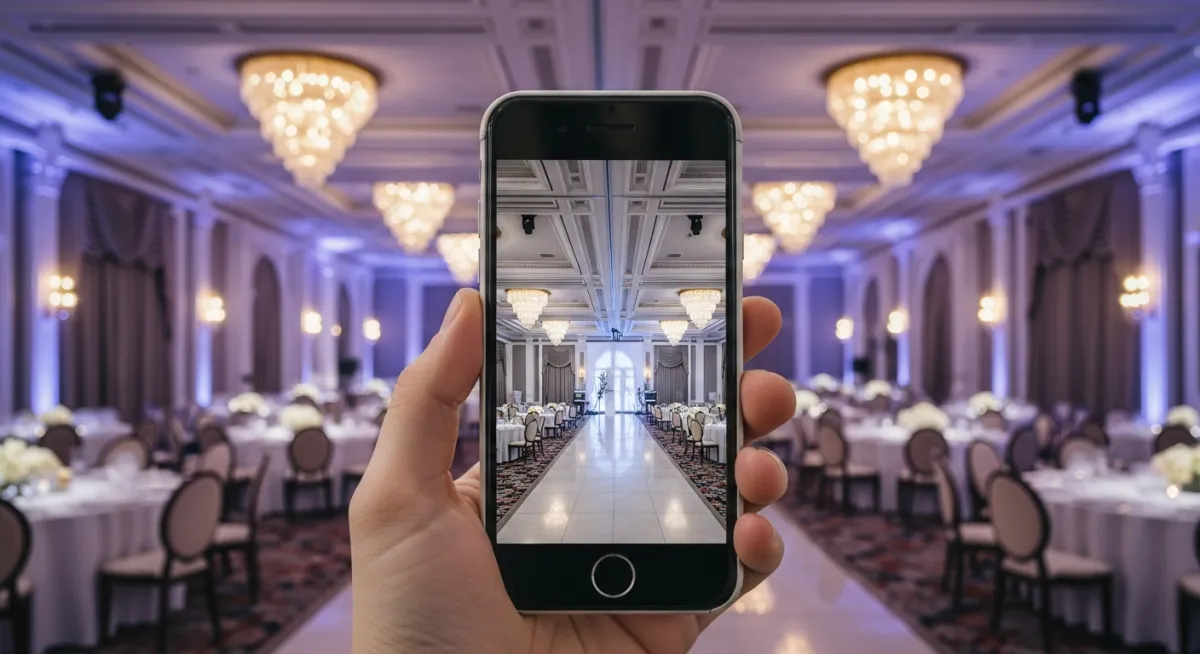
1. The Hero Shot. One wide-angle photo of your main event space that shows its full potential. This is the first image people see and it determines whether they scroll further. The room should be clean, well-lit, and styled � even minimally. If you have string lights or uplighting, turn them on. The goal is to show maximum beauty with zero clutter. This is your first impression. It matters.
2. Event Setup Shots. Three to five photos of your space set up for different event types. A wedding reception with round tables, centerpieces, and dance floor setup. A corporate meeting with theater-style seating and presentation screen. A birthday party with lounge furniture and decorations. These help potential clients visualize their specific event, not an abstract space.
When a couple searching for a wedding venue sees your space set up for a wedding, they immediately picture their event. When a corporate client sees it set up for a meeting, they imagine their team there. Visualization increases booking likelihood dramatically.
3. Detail Shots. Close-ups of interesting architectural features � exposed brick, chandeliers, wooden beams, garden pathways, unique doors, tile work, ornate railings. These convey character and quality without showing the whole room. They break up the monotony of full-room shots and show that your space has personality.
4. Outdoor and Exterior Shots. Show the entrance, parking area, outdoor spaces, and surrounding neighborhood. Clients want to know what arriving at your venue feels like. A beautiful garden. A welcoming entrance. Clear signage. Easy parking. These logistics matter and they matter more when photographed well.
Most venues neglect exterior photos, but they are critical. Clients approach your venue in their car. The parking and entrance create their first impression before the tour even starts.
5. Lifestyle Shots. Photos of real events happening in your space � people laughing, dancing, dining, celebrating. Even a few candid shots from past events (with permission) bring your venue to life in a way that empty-room photos cannot. A beautiful empty ballroom is one thing. A beautiful ballroom full of happy people is entirely different.
How to Get Better Photos This Week: Five Steps
Step 1: Clean and stage your venue. Remove clutter, wipe surfaces, arrange furniture intentionally. Simple touches like fresh flowers, candles, draped fabric, or table settings elevate the look significantly. You are not trying to hide the venue. You are trying to show it at its best. Staging takes 2-3 hours and costs almost nothing. It returns 10x in improved listings.
Step 2: Shoot during golden hour (the hour before sunset) for warm, flattering natural light. Golden hour light is forgiving and beautiful. If your venue is primarily used for evening events, also shoot at night with your lighting fully on to show how it actually looks during events. Different lighting conditions tell different stories.
Step 3: Use a smartphone in landscape mode with the camera grid turned on. You do not need a fancy camera. Modern smartphones take excellent photos. Stand in corners to capture maximum depth. Take 50 or more photos from different angles and heights. You want options to choose from.
Step 4: Edit lightly. Use free tools like Snapseed or Lightroom Mobile to brighten shadows, correct color temperature, and crop for composition. Do not over-filter. Your venue does not need a vintage Instagram filter. It needs to look like it actually looks in person � just with better lighting and composition.
Step 5: Replace your listing photos immediately. Upload 15-20 of your best shots to every platform. Put your hero shot first. Organize subsequent photos by event type. This takes two hours and immediately increases inquiries.
Photo Strategy by Platform: Where to Upload and How
Peerspace: They allow unlimited photos. Use that. Upload 20-25 photos. Start with your hero shot. Then show different setup options. Then details. Then outdoor. Order matters � put your best shots first because most people do not scroll past the fifth photo.
Giggster: Similar to Peerspace. Unlimited photos. Use them all. Be thorough.
The Knot: Limited to about 15 photos in the free version. Choose carefully. Hero shot. Three setup variations. Details. Outdoor. Lifestyle shots. Make every photo count.
Google Business Profile: Upload 10-15 photos. These are what people see in Google search results and Maps. Make them stunning. Focus on exterior, main space, and lifestyle shots.
Your Website: At minimum, put your 10 best photos on your website. Organize by event type if possible. Quality over quantity. A website with 12 excellent photos converts better than one with 40 mediocre photos.
Case Study: Portland Studio Doubles Inquiries in 45 Days
A studio venue in Portland had 8 outdated photos on Peerspace � blurry shots taken on a phone four years ago. The space was beautiful but the photos made it look like a warehouse. Peerspace inquiries were averaging 3-4 per month.
The owner spent a weekend doing this system: cleaning and staging the space, shooting 60+ photos across different lighting conditions and setups, editing lightly with Snapseed, and uploading 22 of the best photos to Peerspace.
Within 45 days, Peerspace inquiries doubled to 6-8 per month. The venue owner estimated the total time investment at about 4 hours including staging, shooting, editing, and uploading. The return was doubling a revenue channel with zero additional marketing spend.
The Math of Better Photos
If your Peerspace listing averages 2 inquiries per month and you improve your photos, you might see that jump to 4-5. That is 2-3 additional inquiries per month from existing traffic, no additional advertising. If your conversion rate is 40 percent, that is almost one additional booking per month.
One additional booking per month at an average of $3,500 is $42,000 per year from one afternoon of photography. That is why this matters. Better photos are one of the highest-ROI actions you can take.
Want a step-by-step system? Download the 90-Day $10K Roadmap and build a predictable booking machine for your venue.
